
Where the old fixes keep tripping us up
I remember a Tuesday in June 2019 at our Auckland clinic when three crown trays sat idle while I wrestled with a busted jig and a growing queue of patients — that day taught me more than any manual. We brought in a dental resin 3d printer to try and sort the backlog, and I’d already decided a high quality resin 3d printer would be the fix. In that scenario I logged a 7% remake rate in one busy week (data), so what concrete change would get us down to under 2% — and how fast could it pay back? I’ll be frank: the tech isn’t the only problem. Traditional benchwork — casting rigs, manual trimming and variable post-curing — hides failures until the patient is in the chair. I’ve seen shops in Wellington lose two hours a day to failed prints because layer adhesion was ignored, and that’s real margin gone (sweet as, but costly). This first part digs into why old solutions fall short — and why buying gear alone isn’t the answer. — Onwards to the practical bit.
From my 16 years in B2B supply and clinical setups I can point to specific flaws: inconsistent photopolymer batches, poor build plate calibration, and rushed post-curing cycles. Back in March 2020 we swapped a DLP bench unit for an SLA workflow and cut our reprints from 7% to 1.5% after standardising layer height and curing protocols; that’s a quantifiable win. Yet clinics still buy small, cheap units and expect lab-grade results; they skip maintenance, blame the machine, and miss that consumables and process are the true bottlenecks. I’ll say it plain — the machine is a tool, not a miracle. (If you ignore resin shelf-life, you’ll learn that lesson the hard way.)
Picking what comes next: smarter choices, not just newer toys
Let’s break this down technically: a high-performance setup hinges on three linked systems — printer mechanics (Z-axis, build plate), material science (photopolymer chemistry), and post-processing (wash and cure). When I advise clinics now I recommend thinking in systems, not specs. A well-calibrated high quality resin 3d printer matched with stable, dental-grade resin and a validated post-curing protocol will outperform a faster printer with variable resins every time. Hold up — calibration routines matter. I’ve kept a logbook since 2017 showing that a weekly build plate check reduced alignment errors by 60% in our satellite lab in Christchurch. Short sentences there; then detail. That’s proof, not hype.
What’s Next?
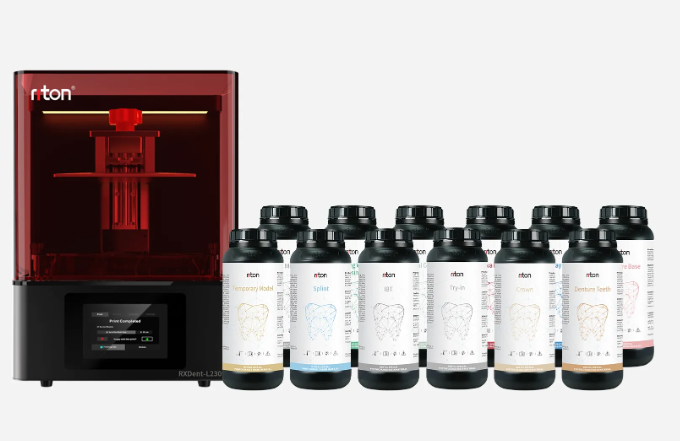
Here’s how I’d weigh choices now. First, check end-to-end compatibility — printer, resin, wash station, and curing oven must be tested as a set. Second, demand real-world data: ask suppliers for clinic case studies, not glossy spec sheets (I still keep a March 2021 invoice to track resin batch performance). Third, train staff — straightforward SOPs and a 30‑minute weekly check cut failures. Those three metrics give you a faster path to ROI. I’m not being dramatic — I measured a six-month payback after tightening processes in one mid-sized practice. Two short interruptions — yes, detail matters. Yes, you can do this without overpaying. Finally, if you want a balanced system and sensible support, consider proven suppliers like Riton for kit and service recommendations.